Create an affordable Kubernetes cluster at home with Raspberry Pi parts and budget-friendly options like refurbished Proliant servers. Optimize performance by including NVMe storage and selecting the right hardware. Achieve high functionality without a hefty price tag. Find out more ways to enhance your setup for excellent results.
Key Takeaways
- Raspberry Pi cluster components offer cost-effective Kubernetes setup.
- Consider Cloudlet CASE for Raspberry Pi cluster for optimal performance.
- Utilize refurbished Proliant server for budget-friendly cluster expansion.
- Add NVMe storage via USB adapter for enhanced data processing.
- Explore managed Kubernetes on Compute Engine for simplified maintenance.

UCTRONICS 19” 1U Rack Mount for Raspberry Pi with SSD Mounting Brackets, Thumbscrews Front Removable Bracket Supports Up to 4 Raspberry Pi 5, 3B/3B+, 4B and 4 SSDs, Option SD Card Adapter
Design for Raspberry Pi: Supports installation of 4 Raspberry Pis and 4 ssds, compatible with any 2.5” Solid…
As an affiliate, we earn on qualifying purchases.
As an affiliate, we earn on qualifying purchases.
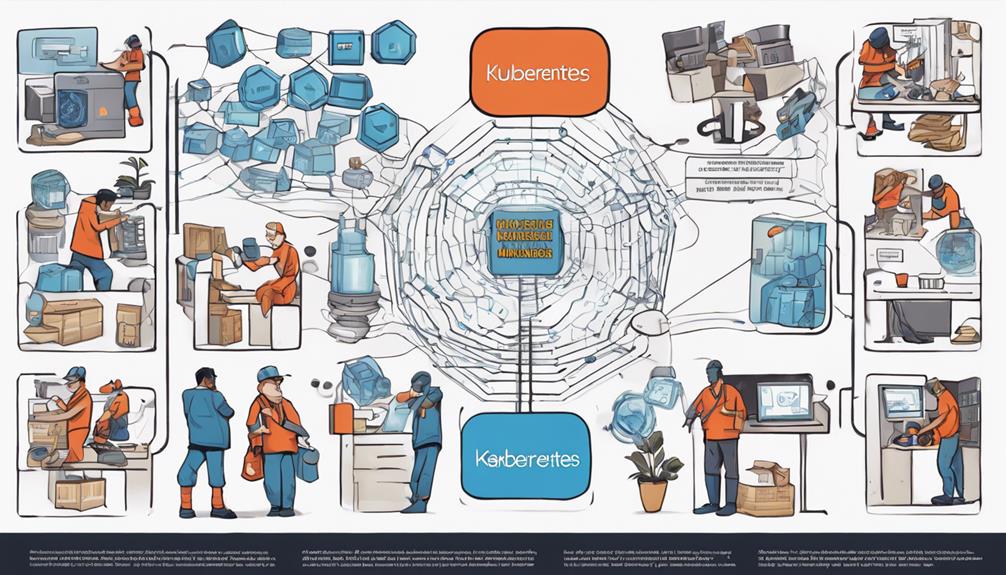
Cluster Hardware Components
Choosing the right hardware components for your Kubernetes cluster setup involves selecting cost-effective options like the Raspberry Pi cluster components. Raspberry Pi offers a low-cost solution for creating your own cluster, including an enclosure, power supply, cooling system, and network switch. The Cloudlet CASE, specifically chosen for its affordability and portability, complements the Raspberry Pi setup perfectly.
For a mere $838.41, you can build a 32-core cluster with 32 GB of RAM and 512 GB of disk space using Raspberry Pi components.
To enhance storage capabilities, consider options like adding NVMe storage via a USB adapter.
Alternatively, if you're looking for an even more budget-friendly approach, a refurbished Proliant server could be acquired for less than $350.

PCSP ProLiant DL380 Gen10 2U Server, 2X Xeon Gold 6132 3.70GHz (28 Cores Total), P408I-A RAID, 8X 1.2TB 10k SAS (Renewed) (192GB DDR4)
System: PCSP ProLiant DL380 Gen10 8-Bay SFF Server
As an affiliate, we earn on qualifying purchases.
As an affiliate, we earn on qualifying purchases.
Motivation and Purpose

If you're wondering why you should start on building a Kubernetes cluster at home, consider the cost-effective experimentation and learning opportunities it offers.
By setting up a reliable and affordable platform for running containerized applications, you gain hands-on experience with Kubernetes without breaking the bank on cloud services.
This approach allows you to tailor the cluster to your specific needs and budget while honing your skills in a controlled environment.
Purpose of Cluster
The motivation behind the creation of this Raspberry Pi cluster is to conduct benchmarks for DataFusion and Ballista projects, specifically designed for efficient operation on limited computing resources.
Here are three key reasons for the purpose of the cluster:
- Testing Distributed Systems: Running projects in Rust on the Kubernetes cluster allows for testing the resilience of distributed systems in real-world physical environments.
- IoT and Edge Computing: The cluster's cost-effectiveness and portability make it ideal for potential applications in IoT devices and edge computing, demonstrating its versatility beyond benchmarking.
- Optimizing Performance: By setting up static IP addresses and optimizing software on each Pi, the cluster ensures smooth use and performance, laying the groundwork for future exploration of query engines and running applications.
Cluster Setup Approach
To proceed with setting up your Kubernetes cluster at home for benchmarking DataFusion and Ballista projects, it's important to outline the approach for cluster setup and its underlying motivation.
The motivation behind establishing this Kubernetes cluster for less at home lies in the necessity to run performance benchmarks for the DataFusion and Ballista projects efficiently. These projects, designed for limited compute resources and developed in Rust, aim to test the resilience of distributed systems.
Additionally, the versatility of this setup extends to potential applications in IoT devices and edge computing scenarios. By exploring the functionalities of query engines within the cluster environment, you can gain insights into the performance and scalability of these technologies.
As you plan to run various applications on the cluster and share your findings in an upcoming blog post, the cluster's setup using managed Kubernetes on Compute Engine becomes pivotal for achieving your research goals effectively.

UGREEN SSD Enclosure, Tool-Free USB C External, 10Gbps M.2 NVMe to USB Adapter/Reader Supports M and B&M Keys and Size 2230/2242 /2260/2280 SSDs
10Gbps NVMe Enclosure: With the latest USB 3.2 Gen2, this M.2 enclosure can achieve a data transfer rate…
As an affiliate, we earn on qualifying purchases.
As an affiliate, we earn on qualifying purchases.
Setup Process Overview

One of the initial steps in the setup process involves configuring Raspberry Pi nodes with MicroK8s for a cost-effective Kubernetes cluster at home.
To give you a clearer picture, here are some key steps in the setup process:
- Setting Up Each Pi: Begin by setting up each Raspberry Pi node individually to ensure they're prepared for cluster integration.
- Going Remote and Disabling DHCP: Configure the nodes to operate remotely and deactivate DHCP to assign static IP addresses, facilitating stable communication within the cluster.
- Updating Software and Installing MicroK8s: Update the software on each node to the latest versions for best performance. Next, install MicroK8s on each node and add them to the Kubernetes cluster using commands like 'microk8s.add-node' and 'microk8s join' for smooth operation.
TrueNAS Mastery: Practical Storage & ZFS Strategies for Homelabs: Build Reliable, Secure, and High-Performance Storage Systems with Hands-On Labs and … Deployment (TrueNAS Storage Mastery Series)
As an affiliate, we earn on qualifying purchases.
As an affiliate, we earn on qualifying purchases.
Cluster Functionality Check

After setting up each Raspberry Pi node with MicroK8s, you can proceed to verify the functionality of your Kubernetes cluster through a thorough node check. Begin by confirming successful node additions by checking essential details such as node status, IPs, OS, kernel version, and container runtime. This step guarantees that all nodes are properly integrated into the cluster and are communicating effectively.
To further ensure cluster functionality, explore running applications on the cluster. By testing various applications, you can gauge the performance and capabilities of your Kubernetes cluster accurately. This examination allows you to assess how well the cluster handles workloads and whether it meets your performance expectations.
Author's Information and Connectivity

Connect with Andy Grove, the author of this insightful guide on building a cost-effective Kubernetes cluster, through various platforms to stay updated and engaged with the Kubernetes community.
Stay connected with the author through the following platforms to explore deeper into the world of Kubernetes clusters and enhance your knowledge:
- Twitter: Follow Andy Grove on Twitter for real-time updates, tips, and engaging discussions on Kubernetes clusters.
- GitHub: Explore the author's projects and repositories on GitHub to gain practical insights and contribute to the Kubernetes community.
- LinkedIn: Connect with Andy Grove on LinkedIn to network with like-minded professionals, share experiences, and stay informed about the latest trends in the Kubernetes ecosystem.
Engage with the author and the community to exchange ideas, share your cluster setup experiences, and learn from others in the Kubernetes space.
Stay informed about the author's journey in setting up a cost-effective Kubernetes cluster at home and leverage this knowledge to optimize your own cluster setup.
Additional Cluster Details

To further improve the functionality and capabilities of your cost-effective Kubernetes cluster setup, explore the additional cluster details that optimize performance and expand its utility. Consider enhancing your initial cluster by incorporating managed k8s services for easier maintenance and scalability. Running Kubernetes on your setup efficiently requires attention to various aspects such as storage options and hardware alternatives. Below is a table summarizing key considerations for maximizing your cluster's potential:
| Additional Cluster Details | Description | Benefits |
|---|---|---|
| Managed Kubernetes | Utilize managed k8s services | Simplified maintenance and scalability |
| NVMe Storage | Add NVMe storage via USB adapter | Faster data access and processing |
| Refurbished Proliant Server | Budget-friendly hardware option | Increased processing power at a lower cost |
| Performance Monitoring | Implement monitoring tools | Real-time insights for optimization |
Frequently Asked Questions
How Do I Make a Kubernetes Cluster for Free?
To make a Kubernetes cluster for free, use cloud providers' free tiers like Google Cloud Platform. Opt for preemptible nodes in GKE, open-source tools like NGINX for load balancing, and minimize storage costs with shared options.
How Much Does It Cost to Run a Kubernetes Cluster?
Running a Kubernetes cluster can range from hundreds to thousands of dollars, depending on hardware, cloud services, and components. Managed services like AWS EKS offer pay-as-you-go pricing, eliminating upfront costs. Consider your needs carefully.
Can I Create a Kubernetes Cluster Locally?
Yes, you can create a Kubernetes cluster locally on hardware like Raspberry Pi or refurbished servers. It's a cost-effective way to gain hands-on experience with managing virtual machines and setting up Kubernetes using tools like Proxmox and Kubeadm.
What Is the Minimum Hardware for a Kubernetes Cluster?
To run a Kubernetes cluster, you need at least 2 CPU cores, 2GB of RAM, and 30-40GB of storage per machine. These are the minimum hardware requirements for a basic setup.
Can I Use the Same Method to Build a Cheap Kubernetes Cluster at Home as I Would for an Azure Cluster?
When considering building a cheapest azure kubernetes cluster at home, it’s important to note that the same method may not be applicable. Azure clusters are designed for specific infrastructure, while a home setup may require different hardware and configurations for a cheap Kubernetes cluster.
How Can I Build a Cost-Effective Kubernetes Cluster at Home?
Building a costeffective kubernetes cluster deployment at home requires selecting affordable hardware and open-source software. Utilize Raspberry Pi or low-cost servers for nodes, and use tools like k3s for lightweight Kubernetes. Opt for free community editions of monitoring and management tools to keep costs down while gaining valuable experience.
Conclusion
So there you have it – your very own Kubernetes cluster up and running at home on a budget!
Just like a gardener cultivating a garden, nurturing your cluster will require time and effort, but the rewards of a well-oiled system are worth it.
Happy clustering!